
My student recital this year was canceled, as I’m sure is the case for many of you due to the current COVID-19 pandemic. In place of our in-person event, my students and I moved forward with “Plan B” — organizing a “virtual recital”. I went about this process similar to the way my friend Jonathan Roberts did, as discussed in this recent Teacher Feature post.
I pretty pleased with how it turned out, and I’d actually like to use this recital format again sometime in the future! In this long-form blog post, I’ll share specific steps for how I went about organizing and publishing my studio’s virtual recital, and what I learned along the way.
Step 1: Communication with Students and Parents
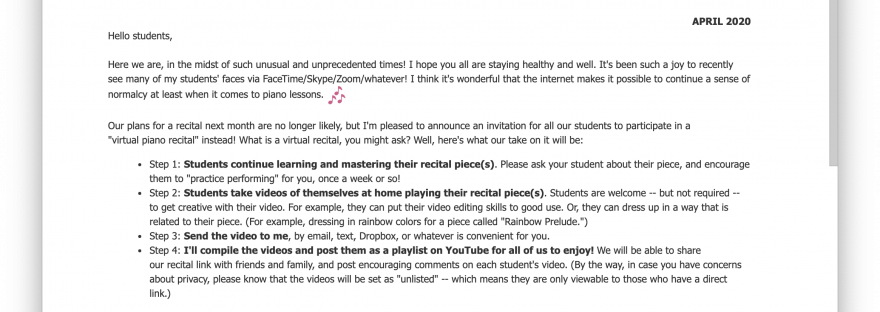
I began by sending an email out to my students at the end of March to announce the virtual recital. I like to “invite” participation, rather than “require” it — because some families are stressed/maxed out right now, and also because I want students to think of it as a privilege to participate!
In the email, I detailed what students needed to do to participate. I think it’s important to “coach” parents through exactly what we teachers would like them and our students to be doing. I am always careful to keep all communication with parents succinct and pleasant. Below is a screenshot of the email I sent out at the end of March.

During each student’s next lesson, I also informed them verbally about the virtual recital. It’s important students and parents both get the information from the teacher, rather than assuming one or the other will keep each other informed!
Over the weeks that followed, I sent a few friendly reminder emails to ensure that parents were keeping this project deadline in mind and helping their students along with their pieces.
Related: 4 Tips for Using Gmail for Studio Emails
Step 2: Collecting the Videos
To keep things easier for parents, I allowed them to send video files to me via whatever format was most comfortable for them: email, text, Dropbox, Google Drive, WeTransfer, etc. When the deadline rolled around and I began receiving video files from parents, I created a folder called “2020 Virtual Recital videos” on my computer to keep the files all in one place.
Inspired by Jonathan’s example, I planned to add applause sound effects to the end of each student video. That step is totally optional, in my opinion, but a nice touch if you enjoy video editing. So, actually, I created two folders on my computer: one for the “original”, unedited files and one for the “final” files.
Tip: Later, after the final videos are uploaded online, you can delete the “original” files from your computer. Video files take up so much space, and it’s good to keep your computer’s hard drive freed up and organized!
Step 3: Editing the Video Files
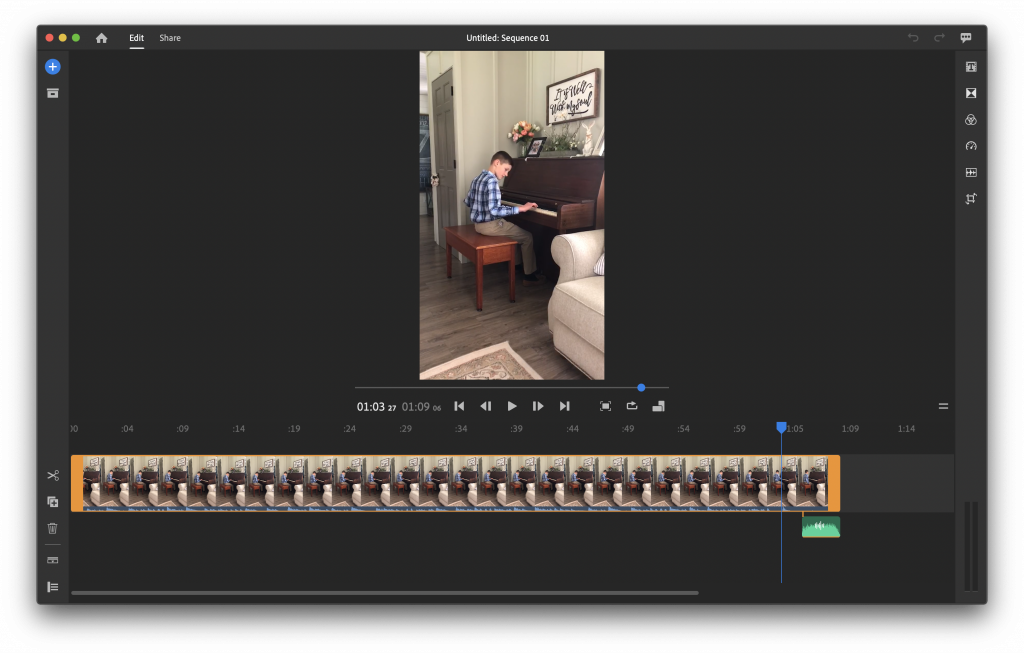
If I had wanted to do only basic edits, such as trimming off a few seconds of the beginning and end of the videos, I could have just used Quicktime Player on my Mac (open the desired video file, then go to Edit > Trim). But I wanted to also add an applause sound effect to the beginning/end of the videos. And I wanted to be able to combine two videos to create a duet for one of my students. Quicktime Player doesn’t have the capability to do those things, so I needed a different software option.
I decided to use Adobe Premiere Rush, deciding that Adobe Premiere Pro was overkill for this project. Premiere Rush is awesome — it’s streamlined to make basic video edits easy and fast. I absolutely love it. I was able to easily import the video file and the applause sound effect files, and then make a few quick edits. Then, I exported the file to the “final” folder on my computer. Easy!
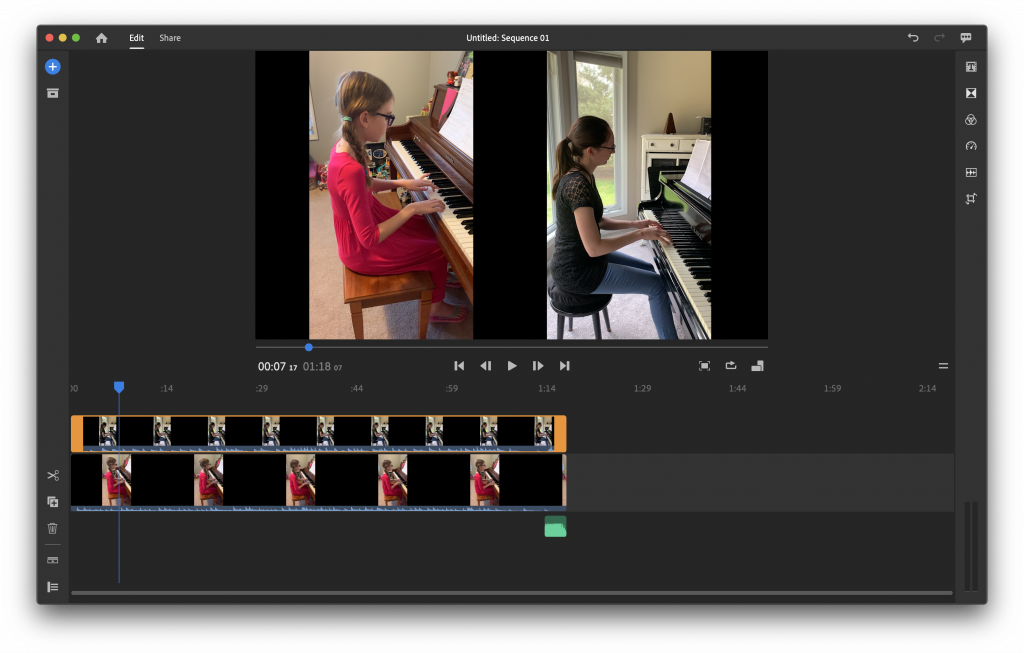
I was even able to combine two videos, to create a duet of my student and I. How did we accomplish this? My student sent me a video of her playing her piece. While listening to her video through my earbuds, I recorded a video of myself playing the duet part. That way, I could follow her tempo carefully. While it’s not the same as being able to play together live, it’s still a nice way to honor our original plans!
Here are links to the applause sound effect files I used:
- FreeSoundEffects.com – for personal, non-commercial projects. Of those available on their website, “Applause 7”, “Claps 3”, and “crowd applause” were the tracks I liked and used the most.
- Just for fun, I ended up creating a blooper reel video, too. I found this blooper reel beep sound at FreeSound.org. You’ll need to create a free account before you can download any tracks from this site. The tracks are free, but some of them require attribution (give credit to the creator when you use the file). My blooper reel contained only my own bloopers, this time. Next time, I’m going to ask my students to save their bloopers and send them to me!
I have access to Premiere Rush due to being a subscriber of Adobe’s Creative Cloud (CC) software suite (as a blogger, I find the Adobe suite useful for various blogging-related projects). Adobe’s entire CC subscription is a bit pricy, but fortunately Premiere Rush is available as a standalone for $10/month (compare plans here). I think that’s pretty reasonable!
(NOTE: As with any subscription, be sure to read the terms carefully when you sign up. If you sign up for the month-to-month plan, you should be able to end your subscription anytime without penalty. But if you sign up for the annual plan, you will be charged a cancellation fee if you try to end your subscription before a year is up.)
I love Premiere Rush, but there are many other video editing software options. Below a short list you could look into. (Let us know in the comments below if you have other software suggestions!)
- Apple’s iMovie (Mac and iOS)
- OpenShot – Open-source video maker
- Screenflow – (Mac only) $129
- Filmora (Mac or Windows) $70 to buy outright; but it looks like there is educational pricing available.
Update: Here is a video tutorial I made showing you more specifics and tips for editing your student videos!
If editing your student videos doesn’t sound like fun, don’t assume organizing a virtual recital is out for you. The editing step is completely optional. If you have limitations as far as your time or current technological skills/resources, you can leave your students’ videos as-is and upload directly to YouTube.
In fact, if you REALLY want to make things easy on yourself, you could require students to each upload their own video to their own YouTube channel. Instruct students to submit the links to you (perhaps create a Google Form for this). Next, create a YouTube playlist for your virtual recital, and add each video to the playlist. Voila! I haven’t tried this myself, but I imagine it’d work pretty well as an alternative method!
That said, I do think adding the applause effect is a nice touch if you’re up for it!
Step 4: Creating Welcome and Thank You Videos
Next, I recorded a short video (about one minute in length), welcoming viewers and thanking students/families for participating in the virtual recital. I created a brief ending video, as well.
I think this is a very worthwhile step to take. It adds a nice personal touch to the project. And the nice thing about video is that you can retry any number of times until you get it right!
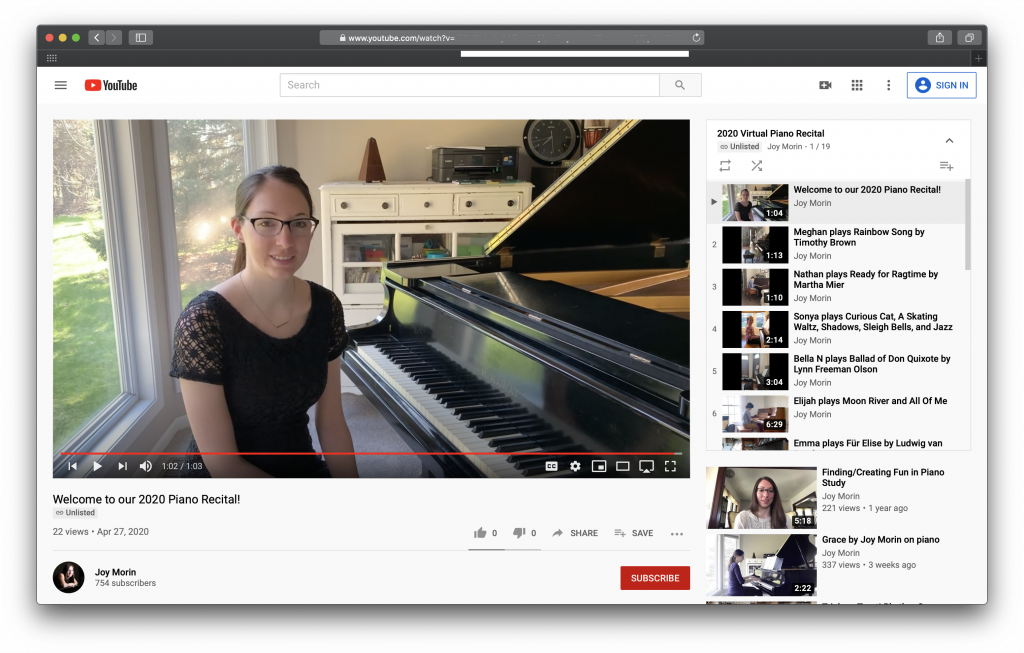
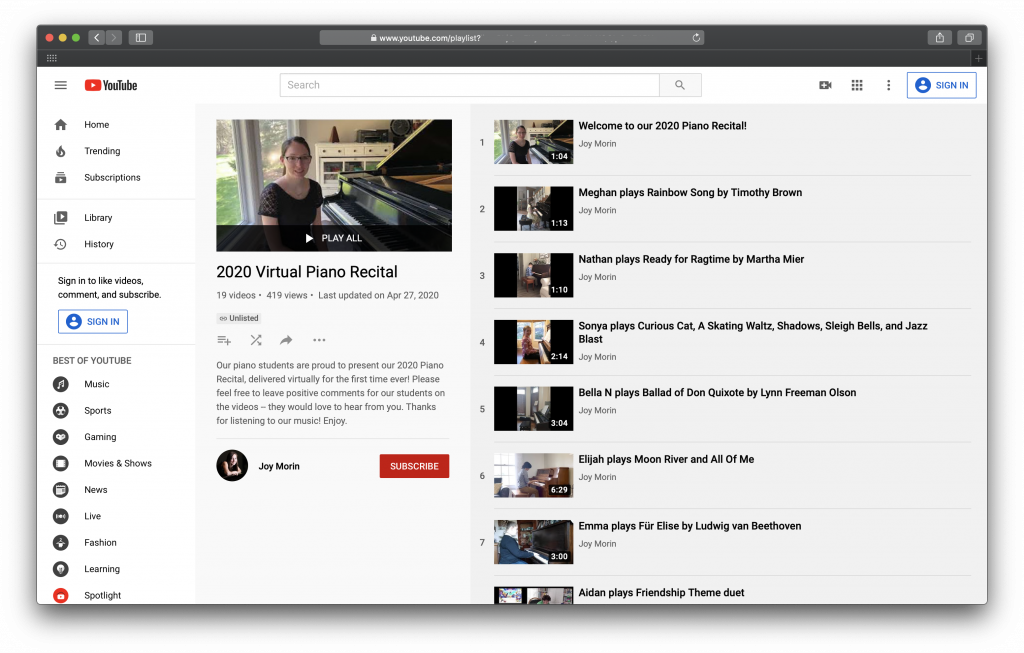
Step 5: Uploading the Videos to a YouTube Playlist
The next step is to upload the videos to YouTube. First, I created a playlist called “2020 Virtual Piano Recital.” I set the privacy setting to “unlisted”, so that only those who have a direct link to the playlist can access it. Some families might be fine with “public” settings, but personally I prefer to keep things more private!
Then, I uploaded each student video, making sure to set each one to the “unlisted” privacy setting as well.
Once they are all uploaded and added to the playlist, the videos can be moved into any order you prefer. At my student recitals, I like to mix students up rather than ordering them by level. Instead, I place contrasting moods or styles back-by-back in order to create an enjoyable program.
Step 6: Sharing the Virtual Recital YouTube Playlist
The final step is to “publish” or share the virtual recital playlist! Once everything was live, I sent out the playlist link to my students and their parents. I encouraged them to make some popcorn and enjoy the whole program. I also invited them to share the link with friends and family members.
I have received nothing but positive feedback so far from parents. They enjoyed watching the videos and seeing how everyone’s videos turned out (as did I!). One parent specifically thanked me for choosing the video format for our virtual recital, rather than holding it live over the internet, because this was low stress. We could all probably use a little less stress these days!
Things I Learned From This Project
Would I use this YouTube video playlist format again in the future? Absolutely! In fact, I’d like to do it again soon, except asking students to perform “everyday” pieces instead of our special, challenging recital pieces. This would result in a shorter recital, which might be nice, while giving students the experience of perfecting pieces and performing regularly.
What did I learn, and what would I do differently next time? Here’s a few of my personal notes:
- Time-wise, I’d say I spent about the same amount of time on this virtual recital as I typically do with preparations for my in-person student recitals.
- As mentioned earlier, I’d love to create a video of student bloopers next time! This means remembering to ask parents to save the “oops” videos and send them to you.
- In the announcement email, I forgot to ask my students to bow at the end of their video. Fortunately, they’re all pros by this point and they did all bow for their video! I’ve trained them well, I guess. 🙂
- I noticed that many students recorded their videos with their phones held vertically. I didn’t mind, but perhaps you might like to request students hold their phones the other way, so you’ll get videos in a horizontal orientation.
- A couple of parents had trouble sending their files — mainly, the students with long videos (as in, over three minutes). Be prepared to suggest more than one sending method, and coach them through it.
- When videos are texted, the result is lower quality files. This may or may not matter to you. I decided it wasn’t a big deal, and decided not to ask students to re-send.
All in all, I’d call it a success! I’m looking forward to doing it again.
I hope this post is useful to you, especially if you are planning your own virtual recital!
Leave a comment: I would love to know… What questions do you have about organizing your own virtual recital? If you’ve already done it before, what tips do you have to share?
Thank you so much for this wonderful idea, Joy! You’ve inspired me to try the online format for my spring recital with my piano students. I love the idea of the duet and the bloopers; what a fun touch!
You’re welcome, Erin! I hope your recital turns out fabulously!!
First of all, I can’t believe how much you and I write alike! It was like reading my own words! AND, looks like we format our recitals the same way – not by level but by contrasting styles of music. Thanks for this post. I’ve got a mom who volunteered to set up and organize our virtual recital and she is using the Zoom format, which is fine as long as she’s willing to do the work! But I do love the YouTube video and editing idea!! I’m keeping it on file for future use. Thank you so much for taking the time to share it!
Sally, how neat that we have similar writing styles, and prefer formatting our recitals by contrasting styles! That’s great that you have help from a student’s mom to organize your Zoom recital. I think there are certain advantages to each format, whether you go with YouTube videos or live over Zoom!
Thank you Joy! Your detailed blog post was a lifesaver! Very helpful!
I’m so glad to hear this was helpful, Kristina!
Thanks for all the great info! Just curious, how many students/ videos were there?
Hello Beth! I recently relocated, so my studio is smaller than usual at the moment. But some students performed more than one selection, which I combined into a single video for that student. Including the welcome, ending, and blooper videos, I think I ended up with about 20 videos and 40 minutes of music.
Thanks Joy! This has been super helpful! How do you make your emails so nice with your logo at the top? Is this something you design yourself or a plugin for your email?
Hi Emily! Now that my studio is “downsized” (due to my recent move to Michigan), I decided to simplify my emails. Instead of using Mailchimp for newsletters, I’m now just using Gmail. I created a template that I can easily call up. The logo at the top is just an image file I use on all my studio documents. It’s been nice having a easier, quicker way to send out my studio updates!
Thank you Joy! I am just getting ready to go through this process for my students this month. I put it off for a few weeks, but really looking into it, I think it will be easier than expected. I’ve mentioned it to my students in their virtual lessons and I think they are looking forward to it too.
I’m glad your virtual recital went so well!
Thanks, Kaly! Good luck with your upcoming virtual recital!
Our virtual recital went very well and I followed much of what you did, Joy! My biggest word of advice…pay a teenager to help you with the technology. They are whizzes!:)
(We used imovie)
Hi Becky! Ha, that’s great — having a teenager help out is a GREAT idea! Big timesaver and as you said, I’m sure they’re whizzes at it. 🙂 Thanks for your comment, and for mentioning that you used iMovie.
Thank you for writing about your online recital in such detail. I am working on putting mine together now also on youtube and hope that I’m on the right track. It is so good to see a success story!
Hi Daisy! I’m so glad to hear you found the details helpful. I wish you the best with your online recital!
I’m so glad to read this, since it’s very similar to what I’m doing! My students’ videos should all be in by Saturday, and my studio is paying my 15-year-old techie son to help edit and put it all together. It sounds like yours went very well, so congratulations! I have always put together a written program in the past, but this year I’m going to have each student say his/her name and the name of their piece and the composer. I’m wondering if you did something like this, too. Thanks, and happy Mother’s Day!
Hi Ruth! No, I didn’t ask students to say their name or piece title, but I do think that’s a nice touch! That’s great to hear about your studio recital project. How nice to have your son helping with the tech end of things! I hope it all goes well!!
Thank you for all of your great tips re creating our own virtual spring recitals, Joy! I think I’m going to use Flip grid. Super easy. I just created an account and I’m having my students upload their videos directly to the site. We’ll see how it goes.??
I’ve heard of Flipgrid! Sounds like an interesting platform. I’d love to hear about how it goes for you, Laurie!!
YOU are a God-Send!….timely info as I was biting my fingernails away, wondering and researching on how to get this done! A bazillion thanks for sharing this!!!
Aw, you are very welcome, Ree!!
Thank you for posting all this great info! I’m in the process of creating an online YouTube recital and this is extremely helpful. I’ve read elsewhere that comments and playlists are not allowed on YouTube, however, because you have to click that children under 13 are part of the videos. Can you confirm this is true and was this your experience? Thank you and again, thanks for posting about your experience with this…
I recommend leaving the “made for kids” option unchecked. After all, it’s not content that was created particularly for children only. Leaving it unchecked means your videos will NOT appear in the YouTube for Kids app, but, you will be able to allow comments on your videos.
I love this! This is exactly what I want to do, but I also have concerns about the new “made for kids” designation for videos. I’ve read varying things on this, but it looks like if the video contains children under 13 you should select the “made for kids” option, and I’ve read with that designation you can’t add the video to a playlist unfortunately. Did you encounter this when preparing your recital?
Since leaving my original comment I have started uploading videos and preparing my recital, and even with choosing the “made for kids” option it looks like I can still create a playlist. Thank goodness! Maybe the people who had created their own posts regarding this were mistaken, or were trying to make public playlists. Who knows. Either way, thank you for sharing your experience and thoughts on this. It was very helpful!
Sorry for my belated response! I recommend leaving the “made for kids” option unchecked, and just uploading it as a usual video. I think you can still go back and change it, if you wish. Leaving it unchecked means your videos will NOT appear in the YouTube for Kids app, but, you will be able to allow comments on your videos. But if that doesn’t matter to you, you can go ahead and leave the “made for kids” option checked. 🙂
I’m glad to hear your online recital project is working out so far! And I’m glad to hear my blog post was helpful.
Hi Jill! Thanks so much for all the helpful info. I have a question about filming the teacher duet video. In the photo that shows your video next to the student’s video, I don’t see earbuds in your ears. Can you clarify whether or not you’re wearing earbuds while recording (in order to line up accurately with the student’s video)? Thank you!
Hello, Robyn! Yes, I did use earbuds. I did my best to keep it hidden, however. 🙂 I put one ear bud in my left ear, and had my laptop hidden out of sight. (You could also use your phone, which would probably be easier to hide.)
Thanks so much Joy!
Thank you! Great idea, and very helpful that you gave so many details to help us to make it work.
You’re welcome, Joost! It was a good learning experience, and it was my hope that the information would be useful to others.
Joy, thank you so much for this blog post! It is so timely! I am currently putting together my virtual recital using Premier Rush and while it is a bit of a learning curve, I think I am finally getting the hang of it (10 done, 22 left to go)! I am excited to see the finished product. Thanks again for this post. It is so, so helpful!
I’m so glad this post was helpful, Laura! How do you like Premiere Rush? I thought it was pretty slick. Best wishes as you get the rest of your videos finished and made live!
Thank you, Joy, for explaining this to us piano teachers who aren’t 20-something! This was easier to understand than Youtube’s videos about it. Only thing I’m concerned about is how the students get the videos to me. If they record on their phone and it’s a long video, something besides text or email has to be used. I use dropbox, but not everyone has that. I know about WeTransfer, but the app on the phone looks confusing. Do you know of an app that’s easy for parents to use, so they can send me their child’s videos? Do you have to have a gmail account to use Google Drive?? Any help is appreciated!
I am so psyched for my first virtual recital. I am trying to figure out how I can play the duet part with my student on video. I am soooo stuck! Help!
When you uploaded videos, did you put in copyright information about the song?
I always give credit to the composers, just as you would do in a printed recital program. As far as I know, I don’t believe it’s necessary to do anything beyond that.
Thanks for all the great information! Any suggestions of online companies that will compile all the videos for me and turn them into a recital video?
I wish I knew of a service like that, but I don’t! Maybe you could hire a high school student? 🙂